|
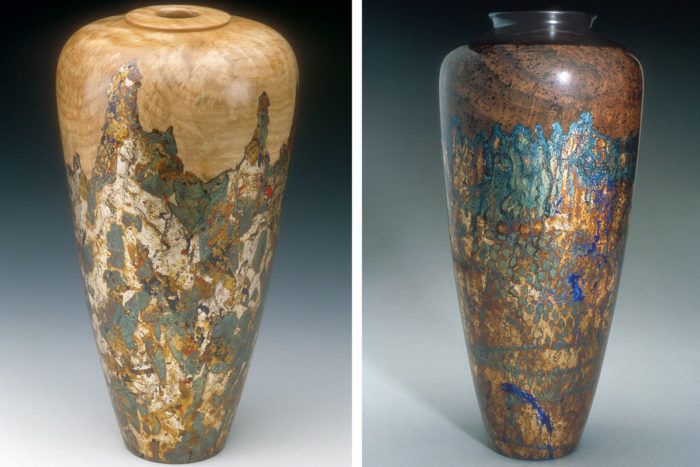
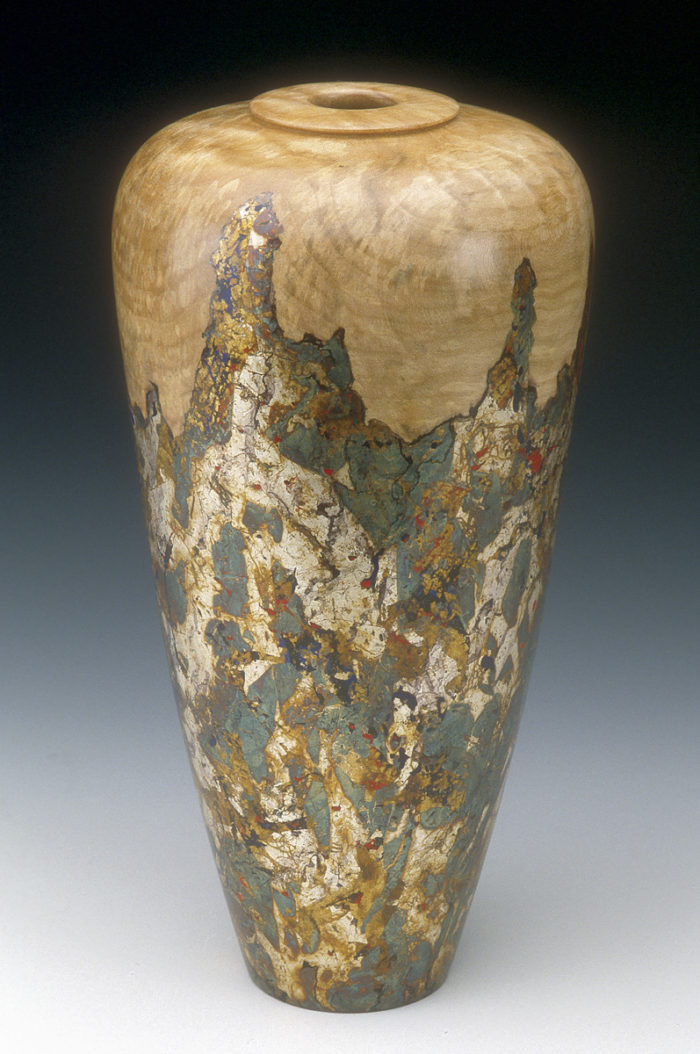
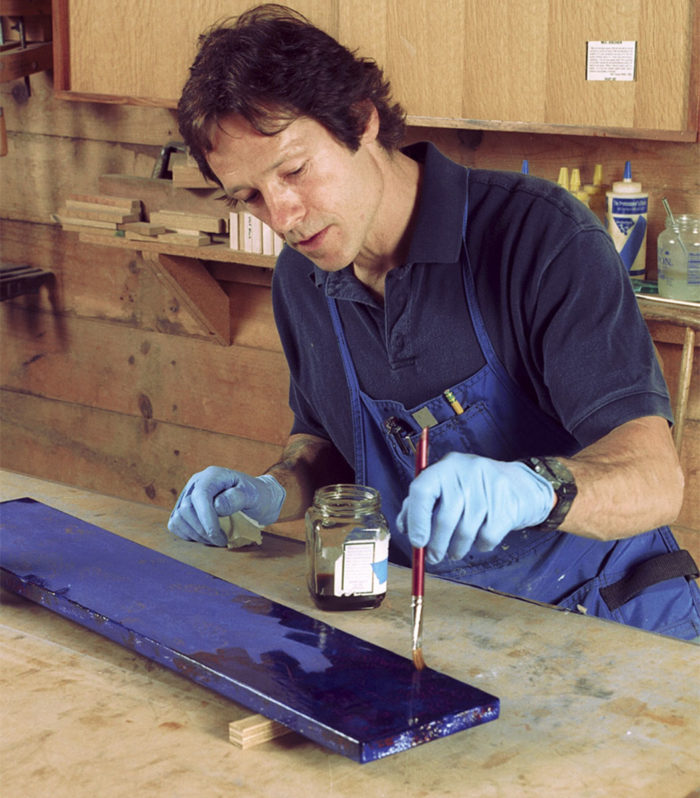
The patina finish, a hybrid wood-coloring technique that I have developed over the past decade, is a trademark of my work. The technique combines the use of paints, gilding (metal leafing), mild acids, and lacquering methods that result in a finish that may look faux, ancient, metallic, or even stonelike.
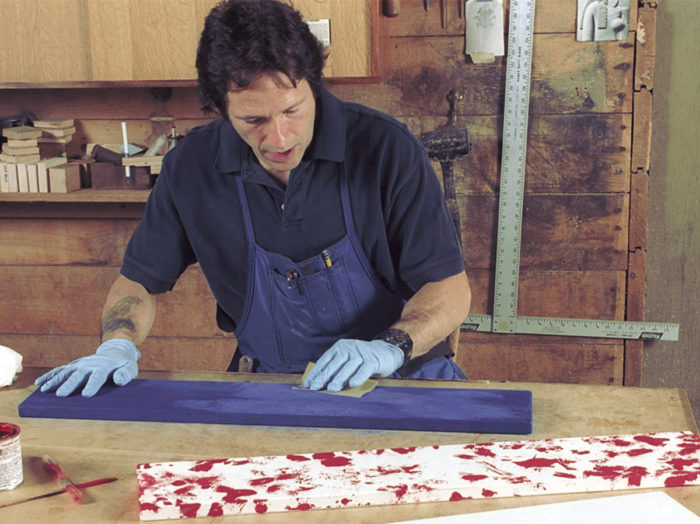
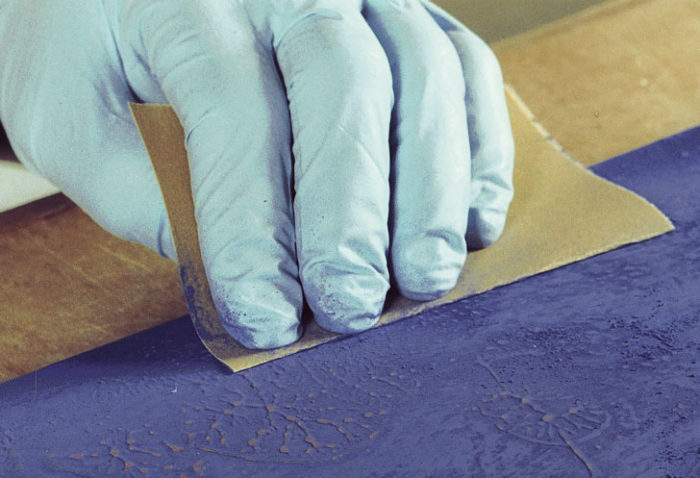
Any type of wood can be used, but open-pore woods need to be filled and thus require more work. When the finished object will be a combination of patinated and natural wood, I choose highly figured stock. But when I plan to color the entire piece, I use paint-grade woods or man-made materials such as medium-density fiberboard (MDF) or plywood. The areas to be colored and gilded must be primed, or sealed, first. I apply white pigmented shellac, which dries quickly. Then I add numerous layers of paint. Either oil- or water-based paints can be used, but I prefer Japan colors, which are oil based. Available in a variety of rich hues, Japan colors dry fast, sand smooth, and may be brushed or sprayed on. After the paint has dried, sand the surface with 320-grit paper, and then selectively sand through various layers of color. The process of layering on colors, and subsequently sanding through the layers to expose underlying colors, is similar to the Japanese lacquering technique known as urushi. Begin with a Layer of Color
Metal leaf goes over the painted surfaces. To add texture and abstract patterns, do not apply the leaf uniformly.
Gilding involves laying very thin layers of metal foil on a surface. (For more on this topic, see FWW #141, pp. 110-114. And for more on the techniques described here, my video Gilding and Chemical Patinations, with Grace Baggot, is available at ) Most people are familiar with gold leaf, but other metals are available in leaf form. Because patination involves tarnishing or oxidizing the metal, gold is not used because it resists tarnish. Metals appropriate for patination include copper, silver, and Dutch metal leaf, which is gold in color.
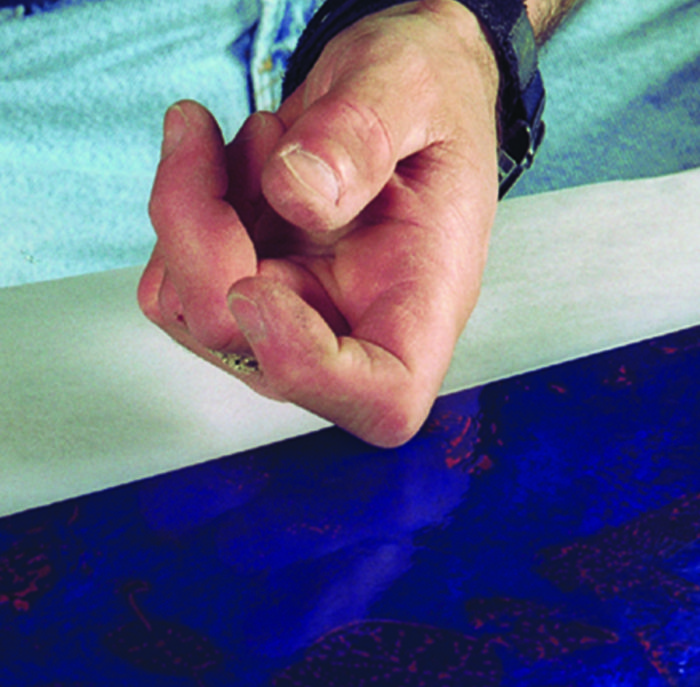
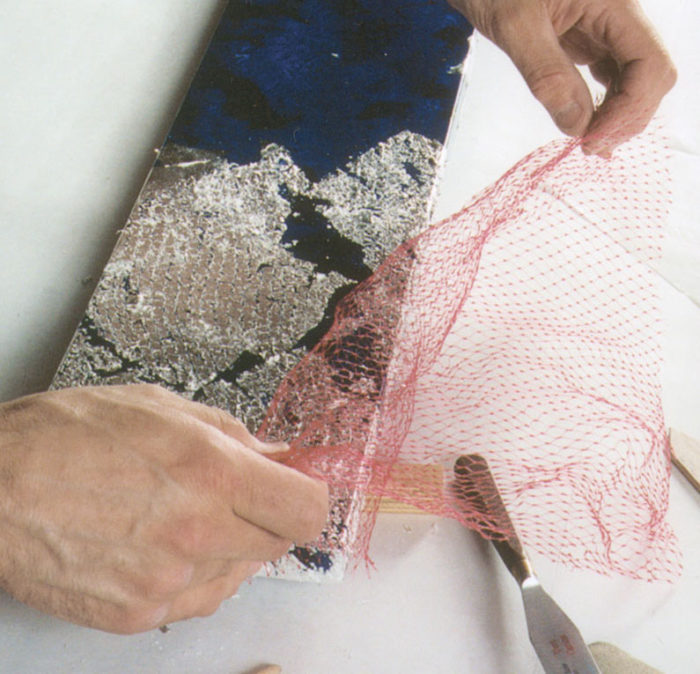
Remove the mesh. The result is a random fish-scale pattern.
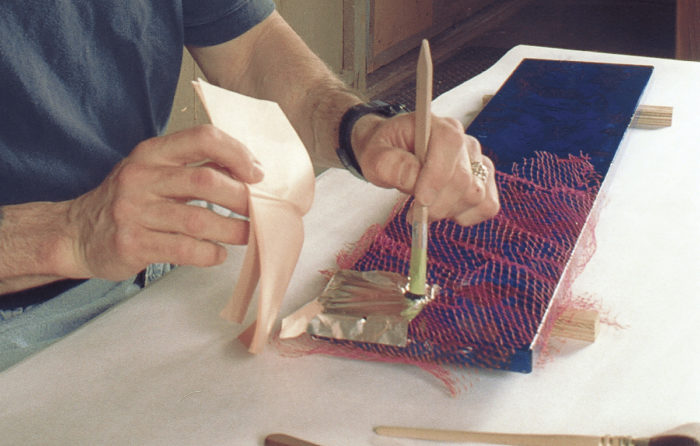
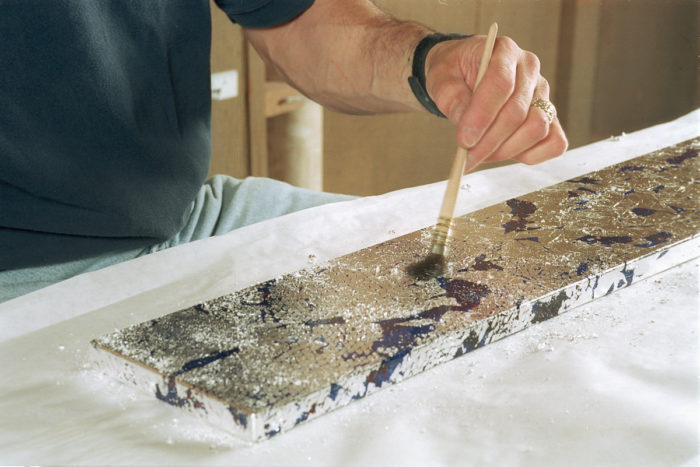
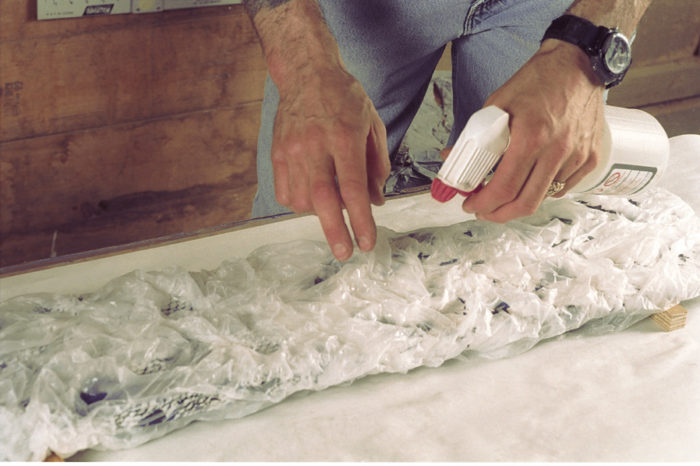
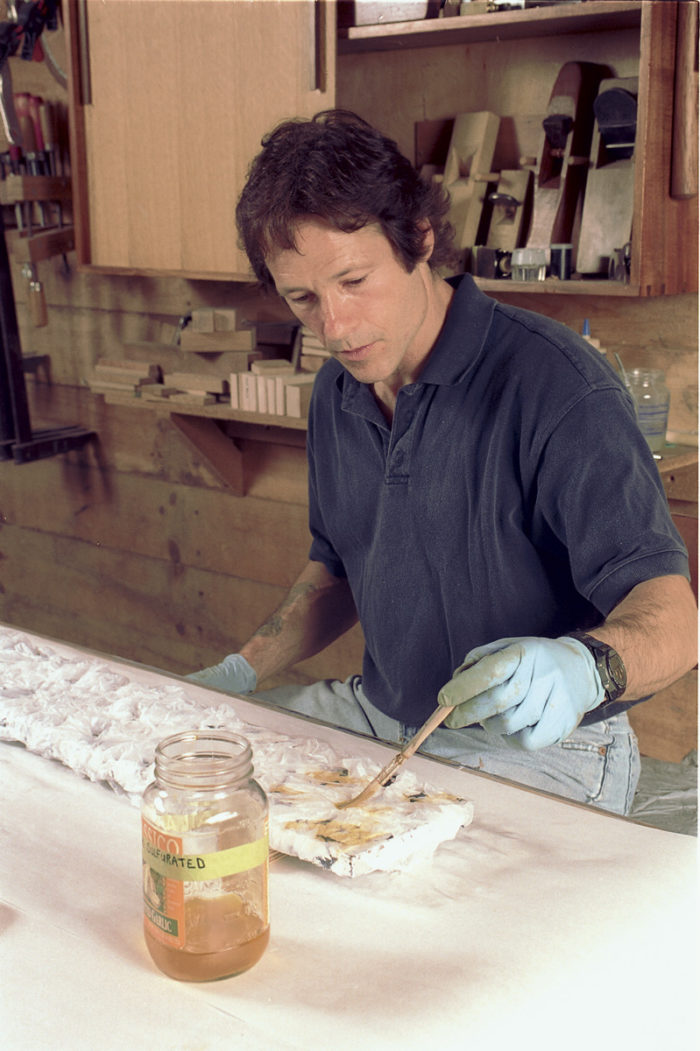
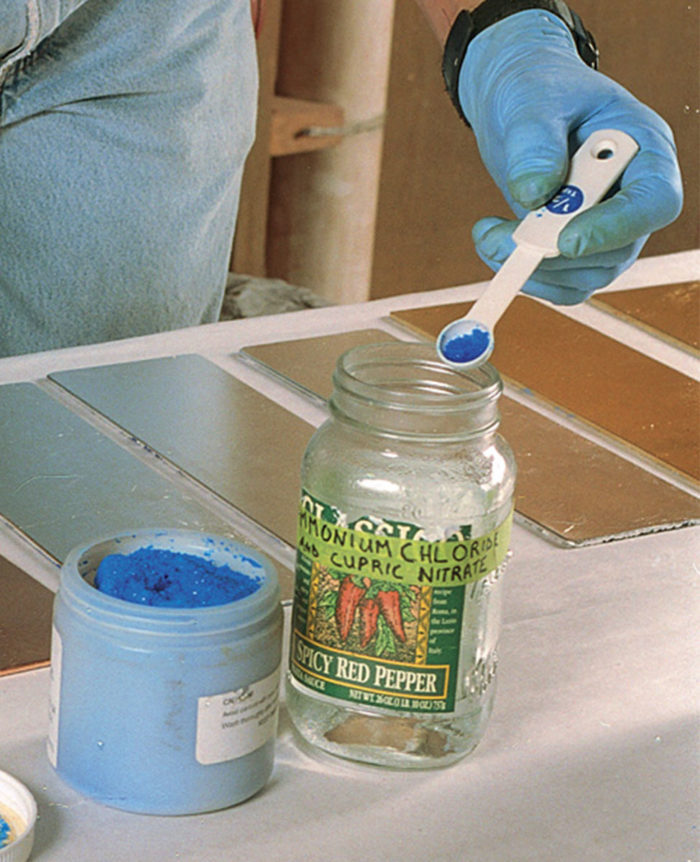
Remove excess metal. After the size has dried and the leaf has adhered fully, brush away loose pieces of leaf.For metal leaf to bond to a surface, an adhesive is necessary. I like to use traditional oil size—either Rolco quick-dry size or Le Franc three-hour oil size—which must be applied to the workpiece with a special brush (see Sources of Supply below). Apply the leaf after the size sets up but before it cures; in this state, it acts as an adhesive. To test the readiness of the size, rub a knuckle across the workpiece. You should feel a slight resistance, as if you were dragging your skin across the sticky side of blue masking tape. Apply leaf in nongeometric shapes, tearing the sheets and laying them down with ragged edges. I deliberately leave about 5% to 30% of the background paint exposed (a Japanese technique called Notan gilding), and sometimes I mix different metals for effect. I also use a mask, or a resist, made of mesh netting to create a fish-scale effect. To burnish the leaf and ensure that it firmly adheres to the size, place a sheet of waxed paper over the leaf and rub it down with your finger. Tarnish the metal with chemicalsChemical patinas are achieved by oxidizing the metal leaf with mild acids. When mixing and using the caustic chemicals, wear gloves and eye protection and work in a well-ventilated space. The chemicals may be applied with a brush, sea sponge, spray bottle, or rag. To avoid an overly uniform patina, apply different absorbent materials to the workpiece to allow different rates of chemical exposure. For example, I sometimes lay wrinkled tissue paper or cheesecloth on the surface (moistened with water so that it remains in place), then apply the chemicals with a brush, dabbing selectively. Feel free to experiment to find the right effect. After the chemicals have done their work, remove the paper or cheesecloth and blot the workpiece dry with paper towels. The chemical reaction is gradual, which allows you to stop the patination process before full oxidation takes place. Different exposure times will produce slightly different colors on the metal only. Color the Metal with Chemicals
Then he dabs on acid with a brush.
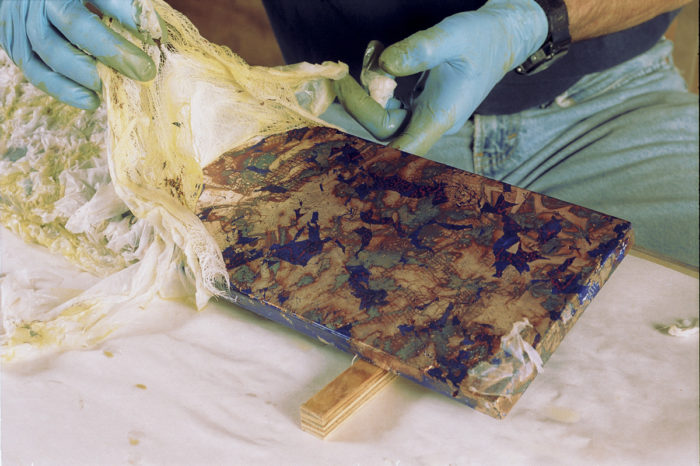
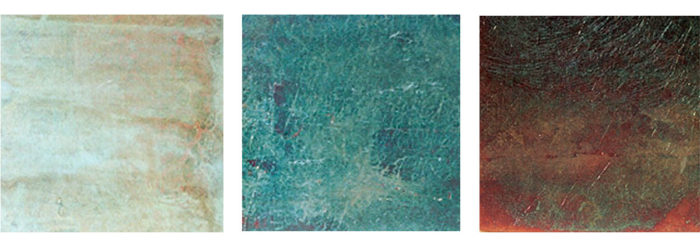
Remove the chemical-soaked cloth. Taking away the cloth reveals a patina with a wide range of tones. Be sure to dab away the remaining acid using a paper towel moistened with water. When dry, the piece should be sealed and topcoated. Painting with chemicalsPatina chemicals are mild acids that will change the color of metal leaf (silver, copper, and Dutch metal). The intensity of the color may be controlled by how much and how long acid is applied. These chemicals are caustic, and it’s a good idea to wear hand and eye protection when mixing them. Work outdoors or in a well-ventilated area.
Potash sulfurated (liver of sulphur) turns silver leaf a gold tone, then magenta, blue, and finally black. Barium sulfide turns copper leaf purple. Sodium sulfide turns copper leaf orange, then magenta, and finally blue. Also turns Dutch metal orange, then magenta, Equal amounts of cupric nitrate and ammonium chloride turn Dutch metal to a green, chalky-bronze patina.
Once the surface is dry, finish it with shellac, vinyl sealer or lacquer, or additional coats of the size. I prefer vinyl sealer because it is neutral in color. Finally, topcoat the piece with your choice of clear wood finish, such as nitrocellulose lacquer or polyurethane. Fine Woodworking Recommended Products
DeWalt 735X Planer At high speed, the planer works fast and leaves a smooth surface. But the slower, finish speed produces an almost glass-smooth surface. Knife changes are easy. Buy at Amazon
Zissner Seal Coat Great as a sanding sealer, and as a final finish. Buy at Amazon
Bahco 6-Inch Card Scraper The size and thickness are what matter here. A consistent performer, this Bahco scraper is found in many shops we visit. Buy at Amazon
Sign up for eletters today and get the latest techniques and how-to from Fine Woodworking, plus special offers.
This site is protected by reCAPTCHA and the Google Privacy Policy and Terms of Service apply. See all newsletters
View FREE Project
when you enter your email address below. (责任编辑:) |